
Getting started with Rust on Zephyr on STM32
This tutorial walks through building your first Rust application on the Zephyr RTOS for STM32, using Workbench for Zephyr in Visual Studio Code. The example targets the STM32F4 Discovery board (STM32F407, Cortex-M4F, with an on board ST-LINK), and the same steps apply to other STM32 boards.
Rust support in Zephyr comes from the zephyr-lang-rust module and is still experimental, but Workbench for Zephyr makes it easy to try: it installs a Rust toolchain with the right embedded targets, enables the module in your workspace, and builds a Rust sample for your board.
Before you start
Install Workbench for Zephyr from the Marketplace or Open VSX, then follow Getting started with Workbench for Zephyr to run Install Host Tools. The full reference guides are at z-workbench.com.
Step 1: Add a Zephyr SDK for ARM
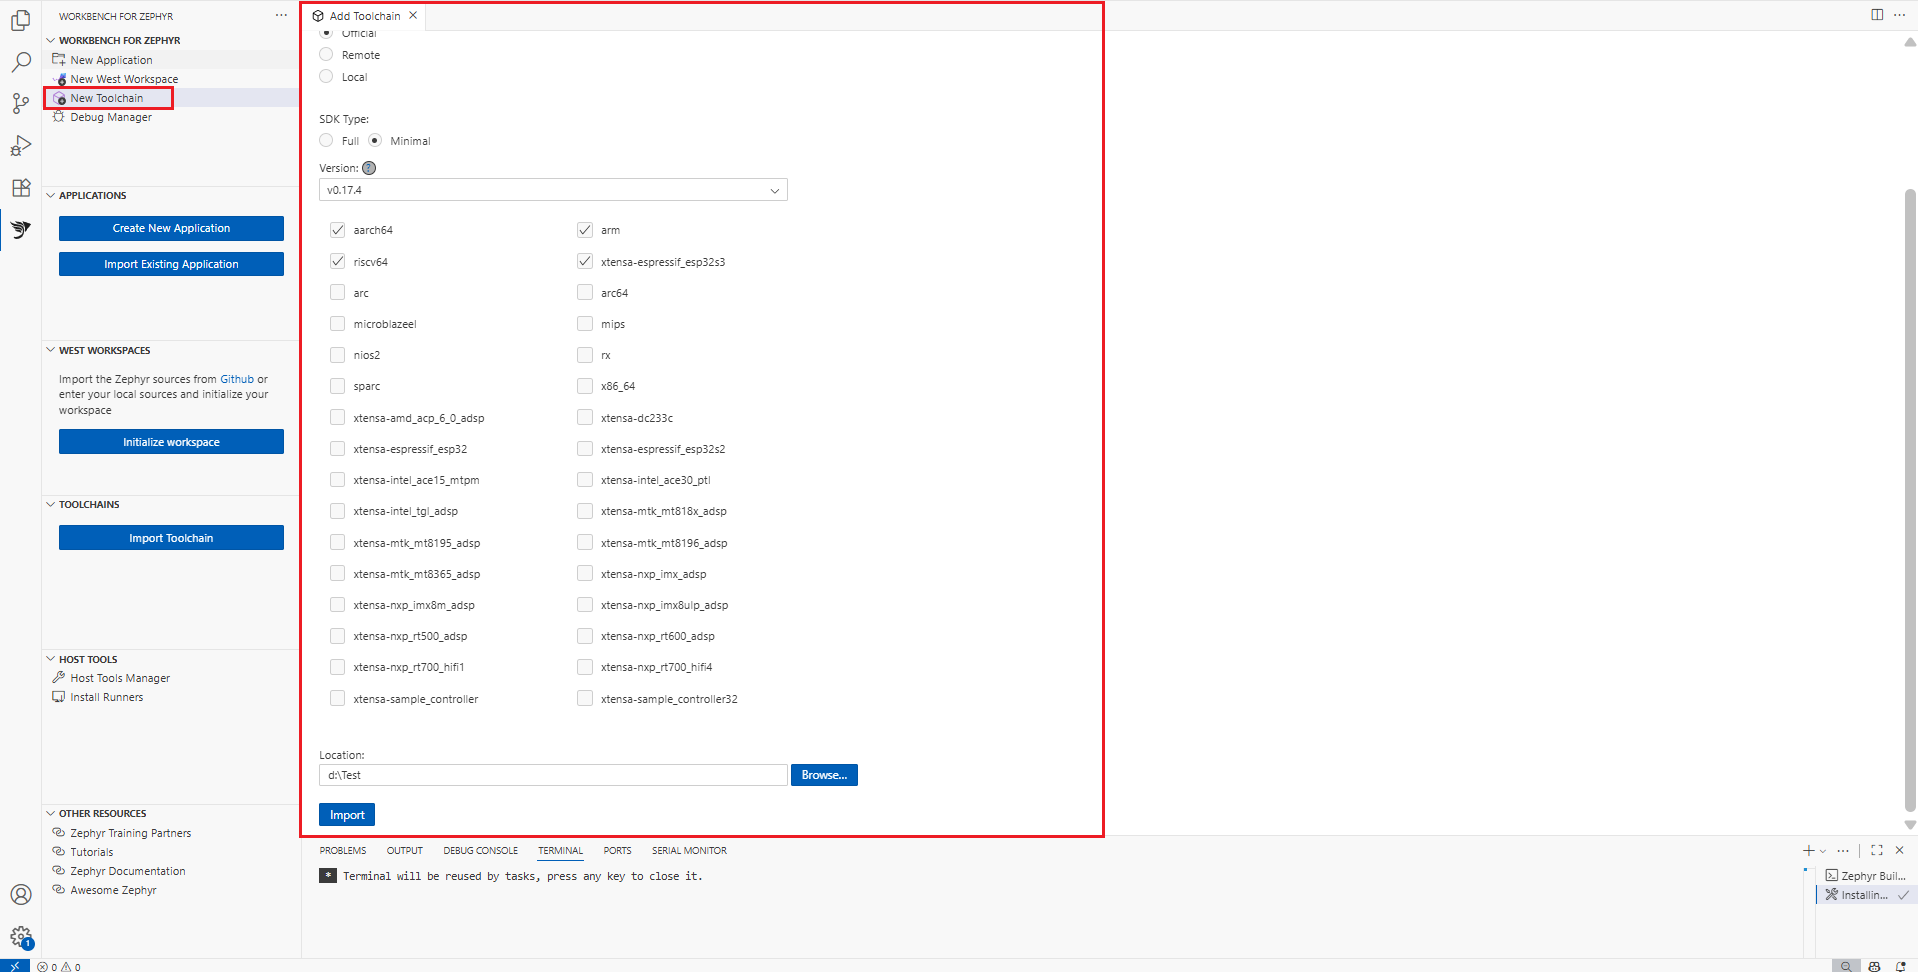
A Rust application still builds through a C toolchain, so add a Zephyr SDK first. In the Toolchains view click Add Toolchain, choose Zephyr SDK, select Minimal and the arm toolchain, then Import.
Step 2: Add a Rust toolchain
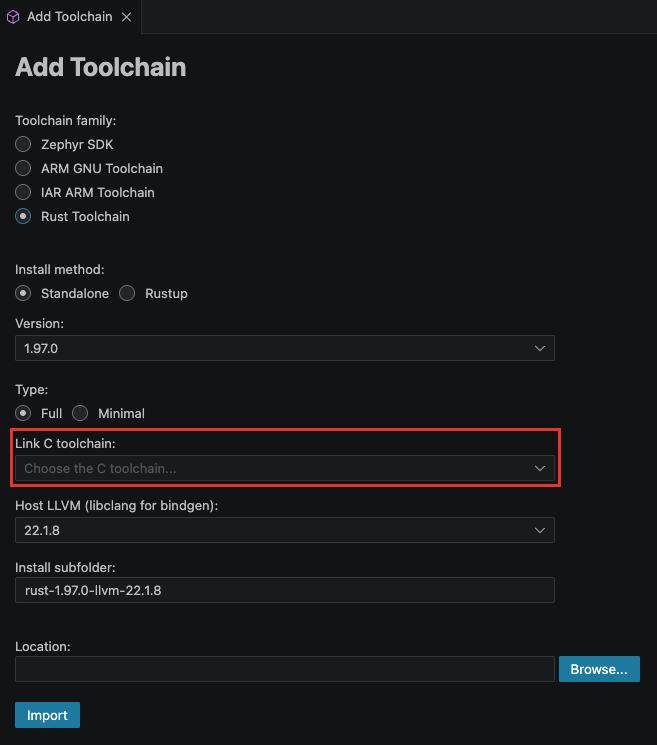
Open Add Toolchain again and choose Rust Toolchain.
- Pick Rustup so Workbench for Zephyr manages the Rust install for you, or Standalone for a self-contained toolchain.
- Choose a Rust version. For the STM32F4 Discovery keep the Cortex-M targets, in particular thumbv7em-none-eabihf for the Cortex-M4F core.
- In Link C toolchain, select the ARM Zephyr SDK you added in step 1.
- Choose a Host LLVM so bindgen can generate the Rust bindings.
Click Import to install it.
Step 3: Create a West workspace and enable Rust
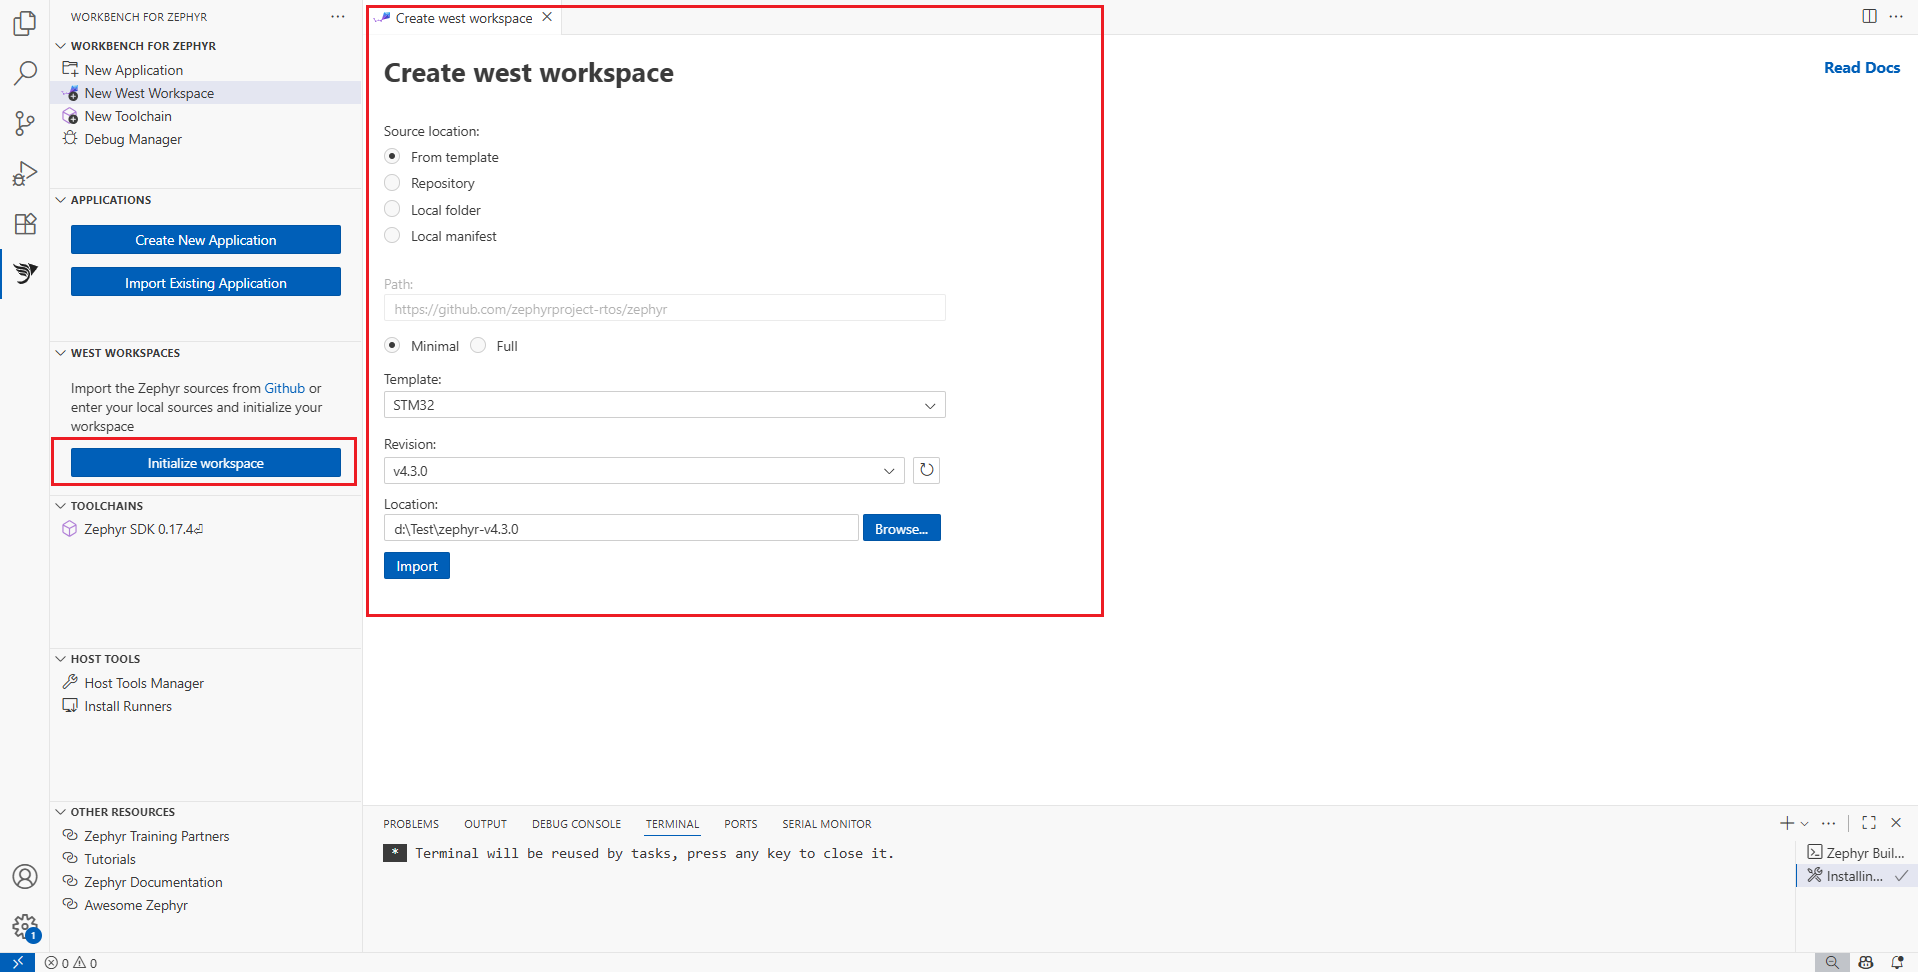
Create a West workspace from the STM32 template (Initialize workspace, source Minimal from template, template ST). Once it is ready, open the West Manager, check Enable Rust to add the zephyr-lang-rust module, click Apply, then Update to fetch it into modules/lang/rust.
Step 4: Create a Rust application for the STM32F4 Discovery
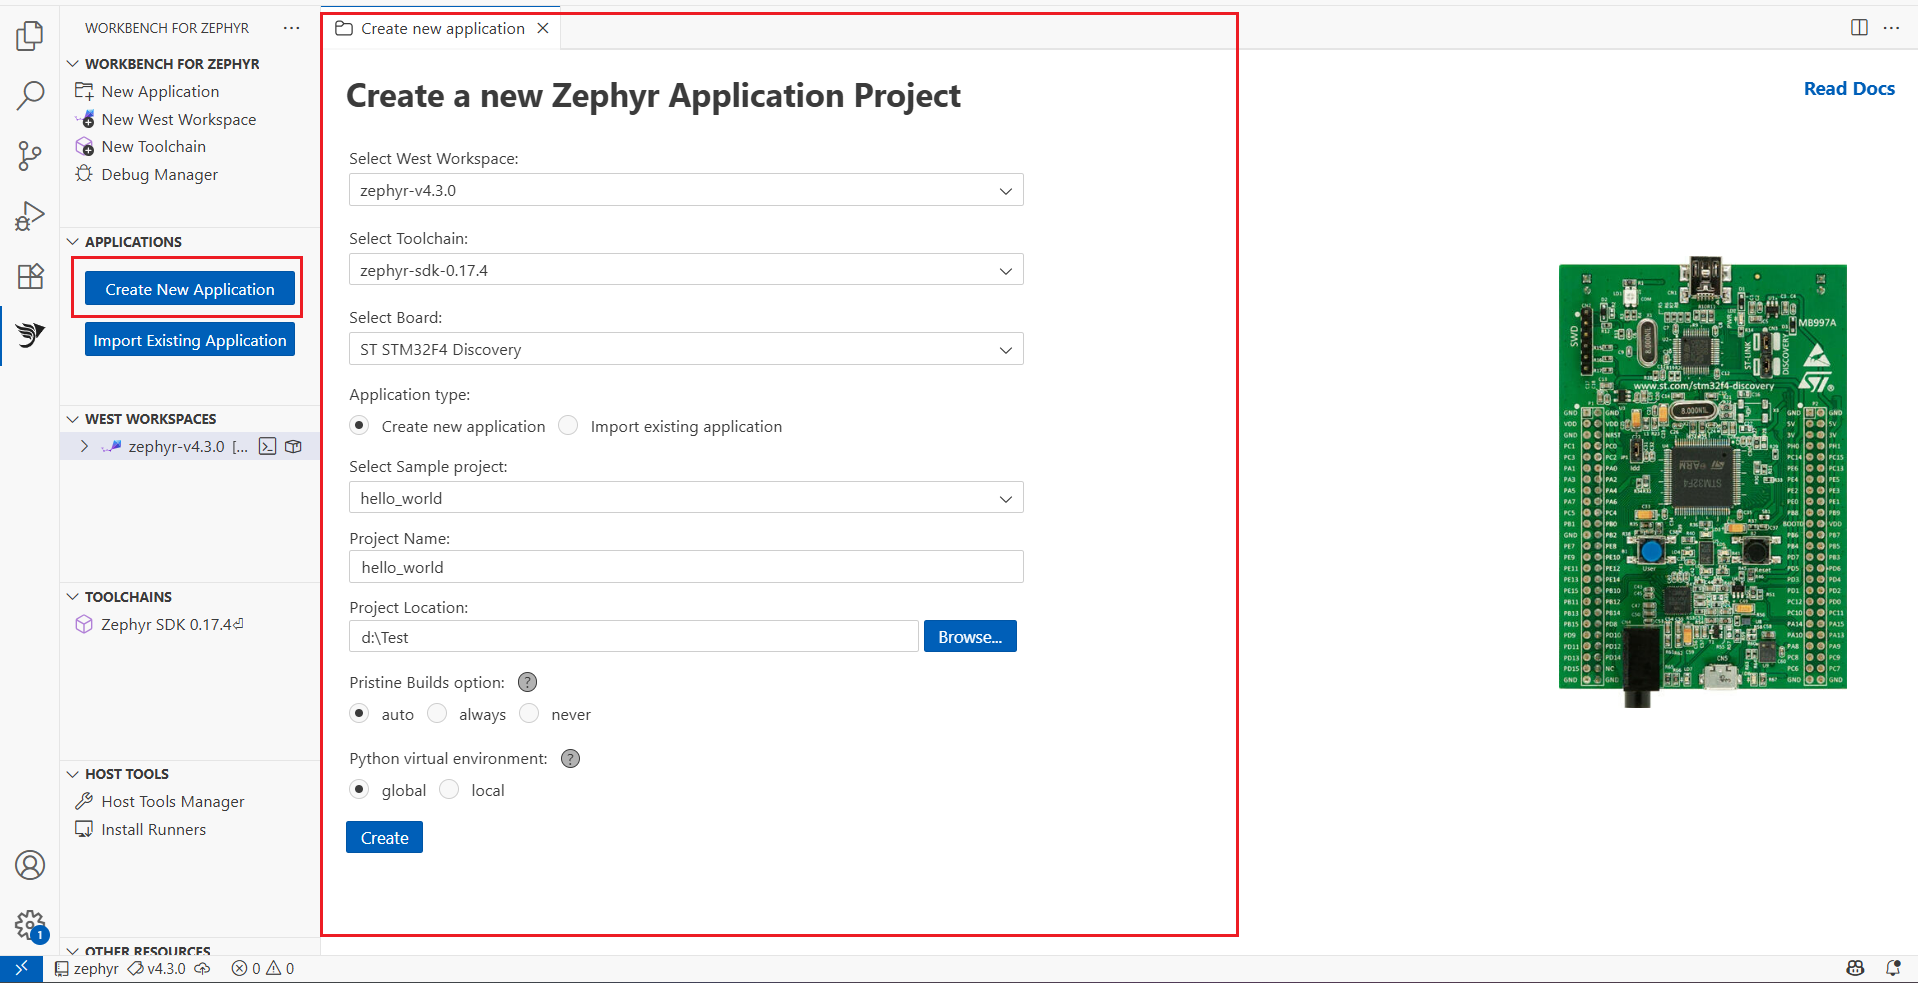
Click New Application.
- Toolchain: select the Rust toolchain from step 2.
- Template: pick a sample from the RUST SAMPLES group, for example a Rust blinky.
- Board: choose stm32f4_disco.
Give the project a name and create it.
Step 5: Build
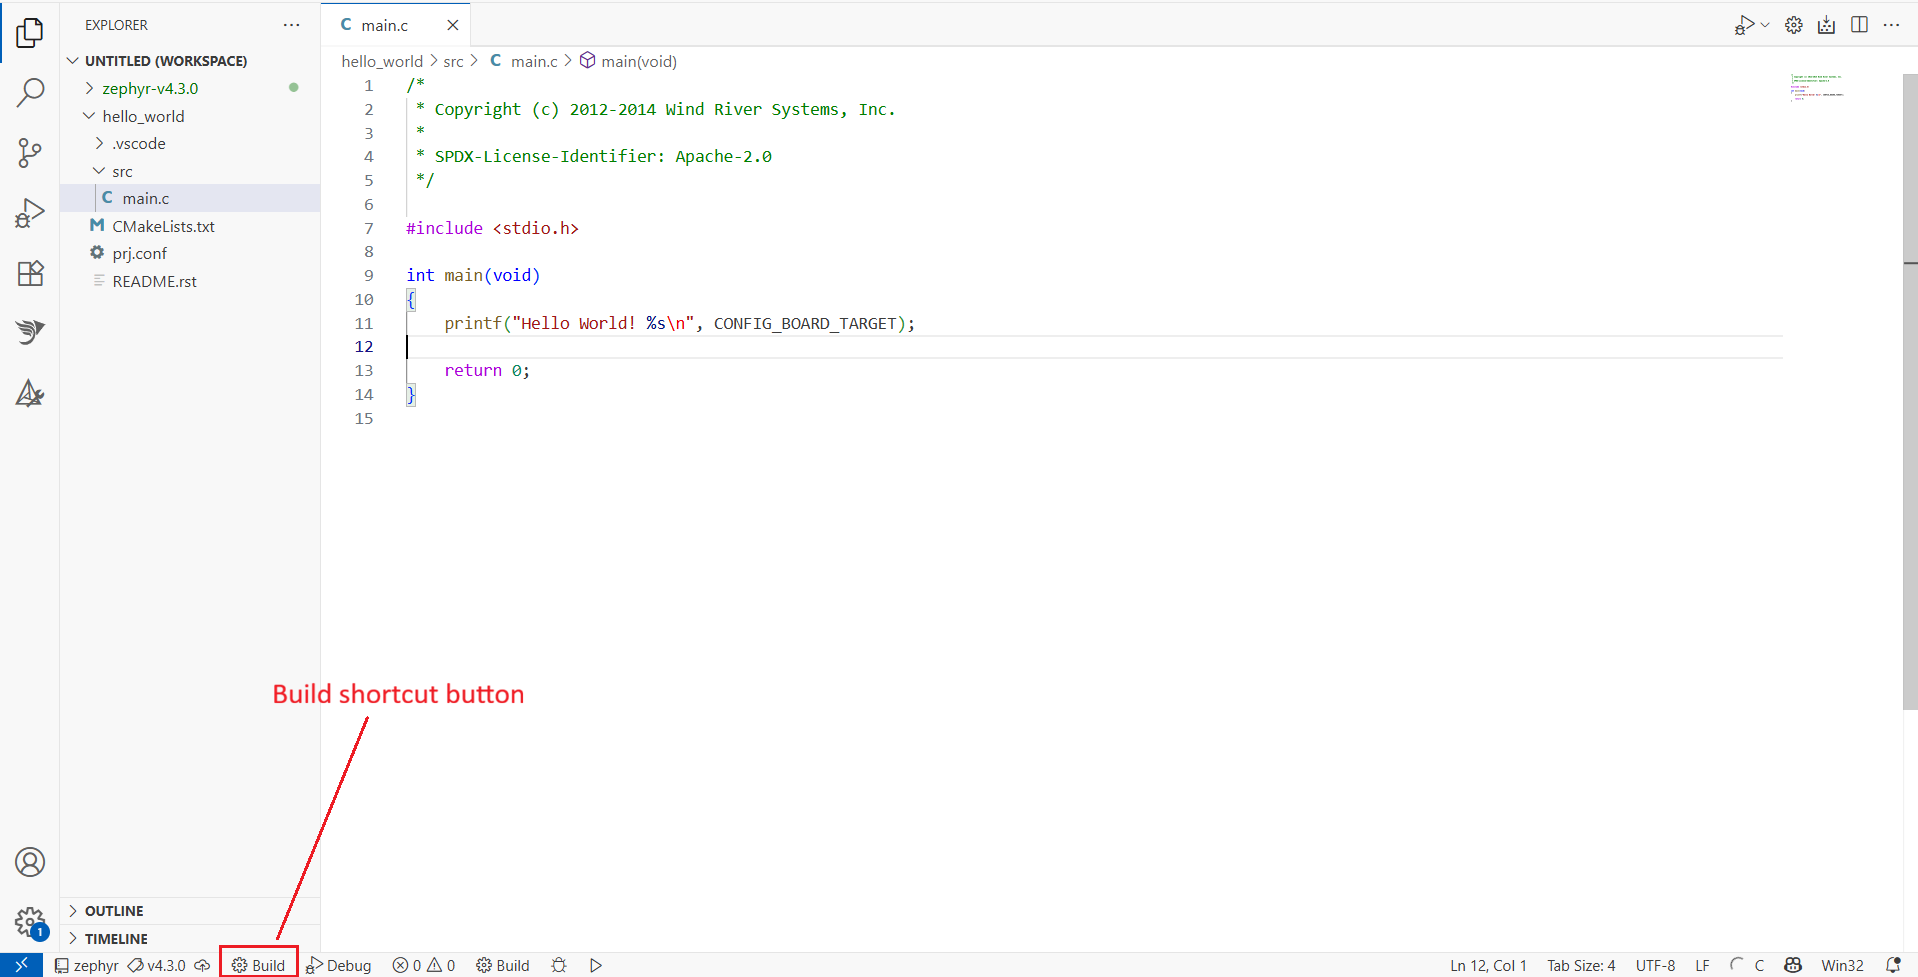
Build the application from the status bar or with the build shortcut. The first Rust build takes a little longer while the crates compile.
Step 6: Flash and debug on the board
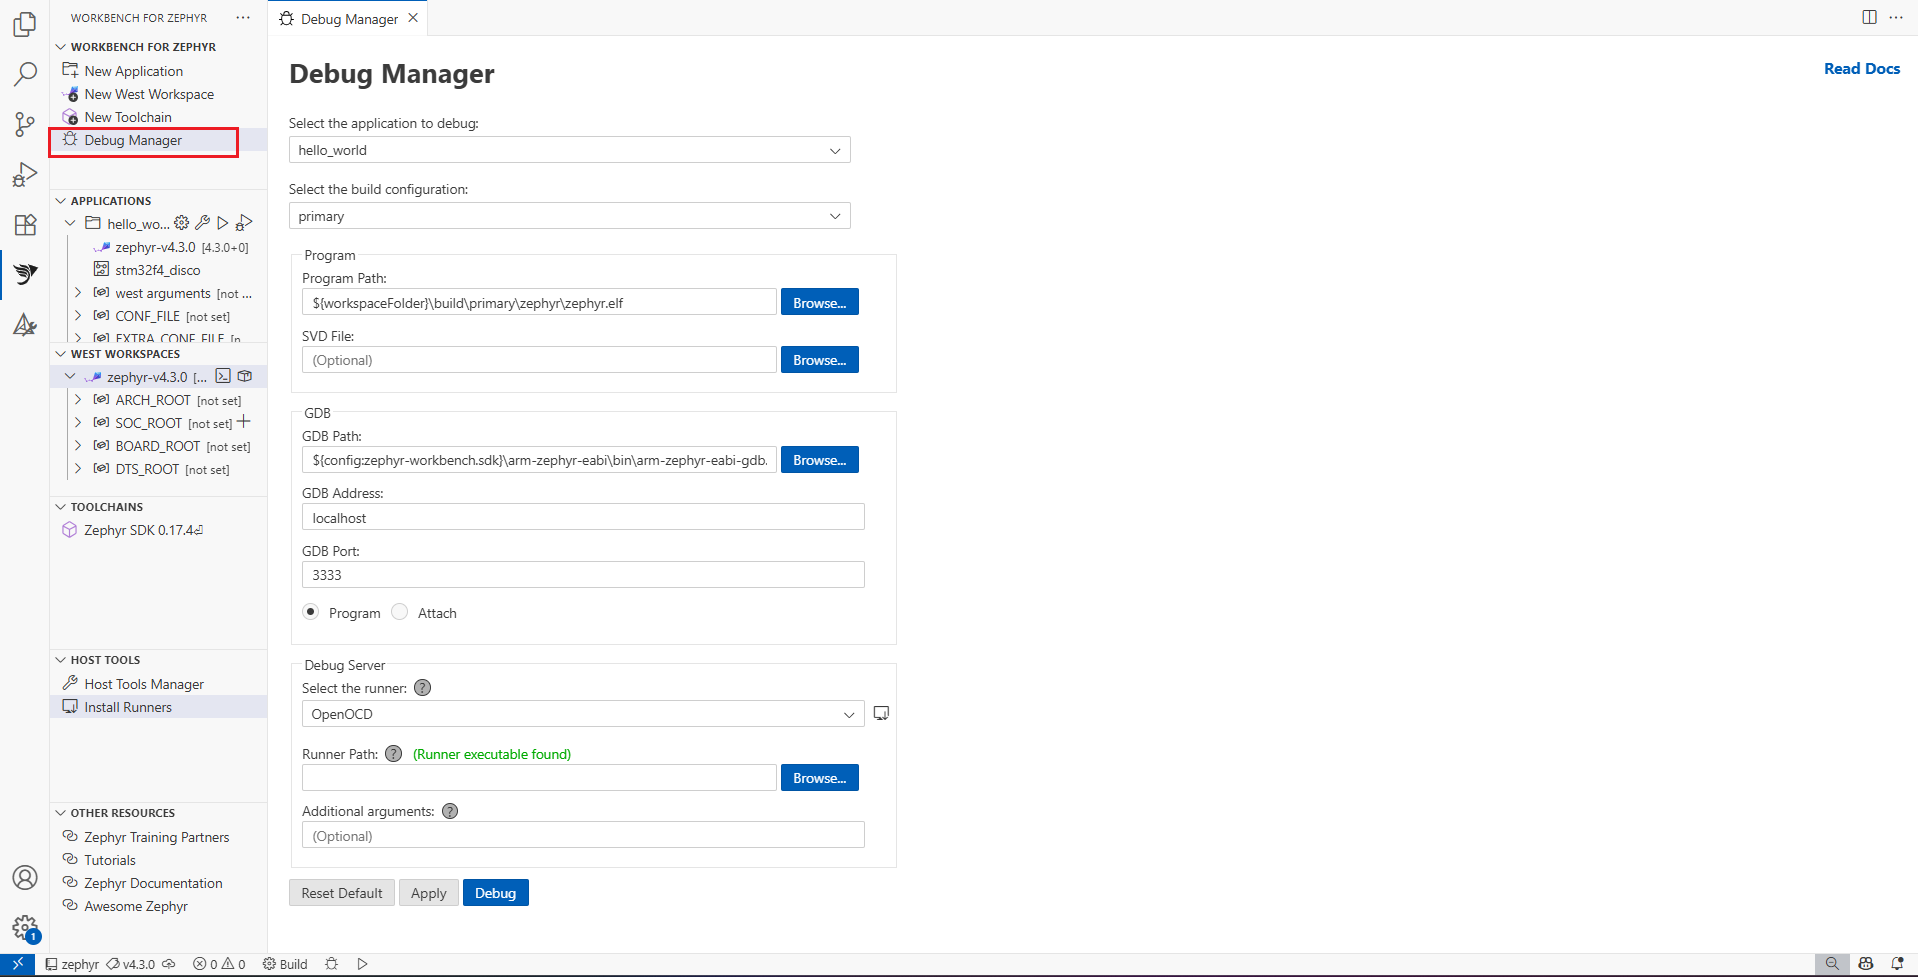
Connect the STM32F4 Discovery over USB. Flash with the default OpenOCD runner over the on board ST-LINK. To debug, open the Debug Manager, select the OpenOCD or ST-LINK backend and start a session; you can then set breakpoints in your Rust code and inspect STM32 registers as you step.
Next steps
Try the other Rust samples, or move to a different STM32 board by changing the board in the application settings. For the full reference, see Toolchains, the West Manager and Debugging on z-workbench.com.
See also: Workbench for Zephyr, Developing STM32 applications with Zephyr.